In this article, we will see how to set up Universal Links for iOS devices in projects using React Native CLI and React Navigation.
What is Universal Link?
Universal Links allows a screen in iOS apps to be shared similar to a web page.
Let’s say you have mobile app. You have a home screen, product listing screen and product detail screen. In that product detail screen, you have a share button. When a user click the share button, user should be able to share the link of that product detail screen via social media like WhatsApp, Messenger or via copying link text.
The link should be same as a webpage link. Something like
https://yourdomain.com/products/123productID456
When the receiver clicked that link one of the following options should be happen:
- If the receiver didn’t install our mobile app yet, the link opens our webpage via the receiver’s default browser.
- If the receiver has our app, the link will open the app and routes exactly the specific screen specified in the link instead of the home screen as usual.
How to set up Universal Links?
In 5 steps:
- Serve apple-app-site-association (AASA) file from your website
- Activate Associated Domains in your Apple Developer Account
- Add Associated Domain to your project with XCode
- Add linking configuration code to you Appdelegate.mm file
- Create a linking object and pass it as a prop to your Navigation Container
1-Serve AASA File
First of all you need an active website and that website should has SSL certificate. So it should be accessible via https. For example:
https://yourdomain.com
You need to create a file and name it apple-app-site-association. No extension like “.json” or “.js”. Just “apple-app-site-association”.
In that file you will create a json like object to configure your applinks. Here is an example:
{
    "applinks": {
        "apps": [],
        "details": [{
            "appID": "<TeamID>.<BundleId>", // 1235678.com.mymobileapp
            "paths": ["/products/*"]
            }
        ]
    }
}
You will replace TeamID and BundleID with your IDs. You will configure paths key depending on your app structure. In the example code i wanted to use universal links only for my product detail page. And i wanted to url should be something like https://mydomain.com/products/:id
This AASA file should be reachable on this url format:
https://yourdomain.com/.well-known/apple-app-site-association
How to do this depends on the technologies you use on your website. In my case, i was using NextJS for my website. Inside my public folder, i created another folder named .well-known and put the aasa file in that folder.
You can use the following link to check your aasa file setup working correctly:
2-Activate Associated Domains in Your Apple Developer Account
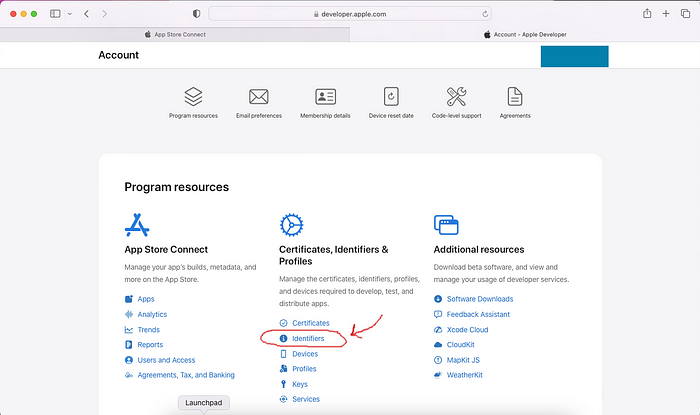
Go to https://developer.apple.com
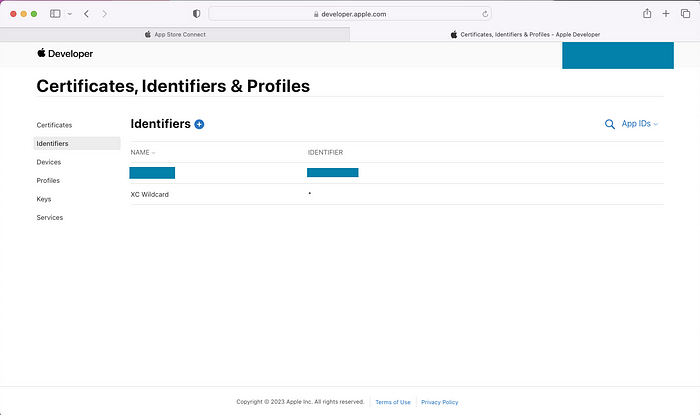
Click Identifiers under Certificates, Identifiers & Profiles

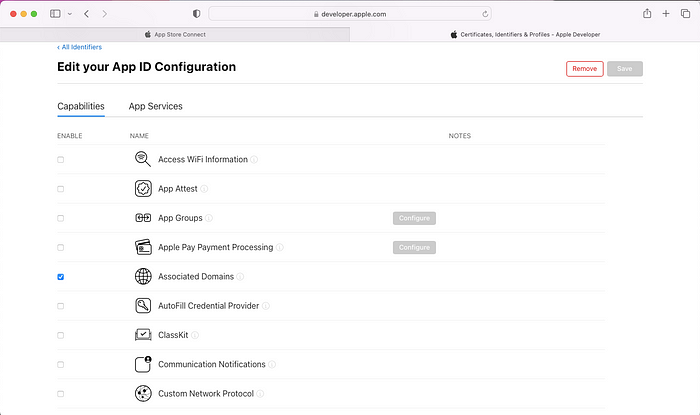
Click your mobile app’s bundle identifier. It’ll open Edit Your App ID Configuration

Click the checkbox of Associated Domains in that page and save.

3-Add Associated Domain to your project
Open XCode.
On the Signing & Capabilities tab, you will see Associated Domains section.
If you don’t see it, click the “+ Capability” button and add it.
In Associated Domains section click the “+” button and add your domain like this:
applinks:yourdomain.com
4-Add Linking codes to your AppDelegate.mm file
Open your project’s AppDelegate.mm file in ios folder.
Copy and paste the following code before the @end statement.
- (BOOL)application:(UIApplication *)application
   openURL:(NSURL *)url
   options:(NSDictionary<UIApplicationOpenURLOptionsKey,id> *)options
{
  return [RCTLinkingManager application:application openURL:url options:options];
}

- (BOOL)application:(UIApplication *)application continueUserActivity:(nonnull NSUserActivity *)userActivity
 restorationHandler:(nonnull void (^)(NSArray<id<UIUserActivityRestoring>> * _Nullable))restorationHandler
{
 return [RCTLinkingManager application:application
                  continueUserActivity:userActivity
                    restorationHandler:restorationHandler];
}
Copy and paste the following code between the other import lines in the file:
#import <React/RCTLinkingManager.h>
5-Create a linking object and pass it as a prop to your NavigationContainer
Open your project and find your NavigationContainer component. It’s probably in your App.js file.
Prepare a linking object based on your own project requirements. Follow the guidelines in the react navigation documentation.
For example, let’s assume your navigation structure like this:
import { NavigationContainer } from "@react-navigation/native";
import React from "react";
import { createNativeStackNavigator } from "@react-navigation/native-stack";
import { createBottomTabNavigator } from "@react-navigation/bottom-tabs";
import { Text } from "react-native/types";

const TestComponent = () => <Text>Hello World</Text>;

const StackProfile = createNativeStackNavigator();
const ProfileStack = () => {
  return (
    <StackProfile.Navigator>
      <StackProfile.Screen name="Profile" component={TestComponent} />
    </StackProfile.Navigator>
  );
};

const StackProduct = createNativeStackNavigator();
const ProductStack = () => {
  return (
    <StackProduct.Navigator>
      <StackProduct.Screen name="ProductListing" component={TestComponent} />
      <StackProduct.Screen name="ProductDetail" component={TestComponent} />
    </StackProduct.Navigator>
  );
};

const Tab = createBottomTabNavigator();
function TabNavigation() {
  return (
    <Tab.Navigator>
      <Tab.Screen name="ProductStack" component={ProductStack} />
      <Tab.Screen name="ProfileStack" component={ProfileStack} />
    </Tab.Navigator>
  );
}

function App(): JSX.Element {
  return (
    <NavigationContainer>
      <TabNavigation />
    </NavigationContainer>
  );
}

export default App;
In this example, in our NavigationContainer we have a TabNavigation. Inside of TabNavigation, we have two StackNavigation named ProfileStack and ProductStack. Inside the ProductStack, we have two screens and one of them is ProductDetail. This is the component we want to link to.
To do that create a linking object like this:
export const linking = {
  prefixes: ["https://yourdomain.com"],
  config: {
    screens: {
      ProductStack: {
        screens: {
          ProductDetail: "products/:id",
        },
      },
    },
  },
};
Then pass this object as value of linking prop of NavigationContainer:
function App(): JSX.Element {
  return (
    <NavigationContainer linking={linking} fallback={<Spinner />}>
      <TabNavigation />
    </NavigationContainer>
  );
}
That’s it. You are now ready to test. Whenever a user click a link something like this https://yourdomain.com/products/1234156 the link will be opened by your app instead of a browser and it’ll open the product detail screen instead of your home screen.
The :id part of the url will be passed to your component as a route prop. So you can get it in your ProductDetail component using route.params.id Then you can fetch that product’s data from your backend.


